Showing posts with label recipes. Show all posts

Friday, March 29, 2013

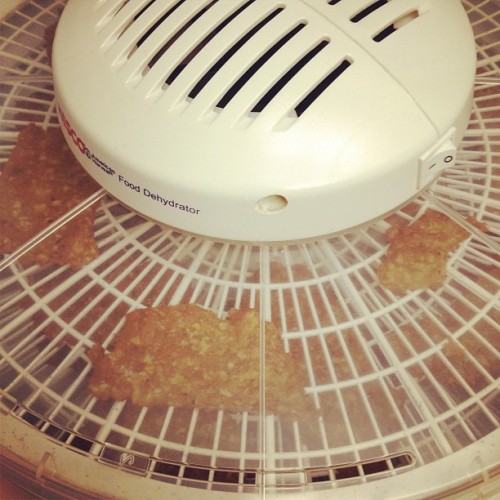
My house smells like meat.

Delicious, seasoned, dried up meat.


This looks pretty gross, but it smells delicious. This is basically my Friday night.  Plus some Netflix watching. I highly recommend "Safety Not Guaranteed".  Not even close to what I expected, but pretty cool. 

I'm so glad the weekend is here.  I have been dead tired all week, still not sure why.  I'm hoping I can catch up on everything and get ready for the week.  I really need to plan the next two weeks, because Nina will be here next Saturday! I am sure we will be going on adventures and eating lots of good food in all of the free time I have.  :)

Here's to a restful yet still productive weekend... is that even possible?

- Liz


Sunday, August 19, 2012

Chicken Philly Cheesesteak

So, after working a 7 hour shift, with no break at the beloved Einsteins, I am here to share another delicious recipe that the gentleman and I tried out.


Chicken Philly Cheesesteak!

While they may not be the best lunchtime snack, these sandwiches pack a ton of flavor and are a perfect quick dinner solution.

Ingredients:
- two chicken fillets
- oregano
- salt and pepper
- 1/2 C bell pepper
- 1/2 C onion
- Sub bread
- cheese

Directions:

Ok, so first things first, you'll want to cut your chicken up into thin strips.  Then season each little strip with oregano, salt, and pepper.  Unfortunately we went a bit wild with the oregano, so be careful how much you use.  Throw these chicken strips into a pan and let them start cooking.

So yummy!
You may need to add a bit of oil to keep the chicken from burning.  While the chicken is cooking, you can begin to cut those peppers and onion into small strips as well.  Feel free to add in some more veggies as well, the more the merrier.  You can go ahead and toss those into the pan as well.

When the chicken is all cooked, and the veggies are starting to soften, you can take them off the heat.  You'll then want to spread them out onto some sub bread.  We personally got ours from Walmart, because its only 1.68 for 6 subs. Once the chicken and veggies are on, top the sub off with some cheese.  We used cheddar, but mainly because that's all we had.  I'm sure any type of cheese would be delicious.  

Now the best part, pop these subs into the oven, or toaster oven, for just a few minutes. We set our oven to broil and left them in there for maybe 10 minutes at most.  You want to leave them in there for just long enough so the cheese melts and the bread begins to get toasty!

Pull them out and enjoy!  We found that they were even more delicious when topped with a little bit of ranch dressing as well.  Feel free to experiment and enjoy your yummy dinner.  

- Lizzie

Friday, August 17, 2012

Mini Pizzas


So everyone loves pizza right? Whether its covered in veggies or loaded with chicken or ham, I am always a huge fan of pizza.  Ben and I are always making homemade pizzas.  However I don't always love taking a big piece of pizza to school.  I like to make sure my lunches are pretty compact so I can pack them in my bag.  So when I saw the idea for mini pizzas, I immediately knew I needed to make them.

Thursday, August 16, 2012

Tuesday, August 14, 2012

A week of firsts

So, as the actual beginning of student teaching draws closer, my Pinterest boards have been filling up with sandwichless lunch ideas.  Since I'm working all this week through lunch time, I figured it would be a great time to test out some new lunch recipes.  My next few blog posts are going to be centered around my new lunch recipes and whether or not I think they would actually be good for taking to school!

I decided I would start off with some easy snack ideas.  My first recipe to conquer was baked apple chips.

Ingredients:
4 fresh apples, sliced to about a 1/4 inch thick
Parchment paper
A mixture of sugar and cinnamon

Directions:
So, first things first, you need to slice the apples pretty thin.  If you have a mandoline, this is the perfect time to break it out! While you're slicing, let your oven preheat to 225.

How cute is my new paring knife???
Lay out your parchment paper on a a few baking sheets - I used three total.  Lay the apple slices down.  Do not let them overlap!

Sprinkle the cinnamon sugar mixture on top of each slice.


Bake in the oven for one hour.  Take the slices out, and flip them over.  Again sprinkle some cinnamon sugar on them.  They should be starting to curl at the edges.  Bake for one more hour.


Last step is to let them cool, and then dig in!

My rating:
I would give these apple chips a 4/5.  They are super delicious, but I wish they took a little bit less time and got a bit crispier.  I think next time, I may turn the heat up just a little bit, to see if that might make them crispier.  I really enjoy the flavor and the fact that they're pretty healthy for you.  These are definitely a snack I would take to school, and we have plans to make some every week.

My next adventure is with homemade potato chips!


What snacks do you take to school or work?

- Lizzie

Sunday, August 12, 2012

Today, we are...

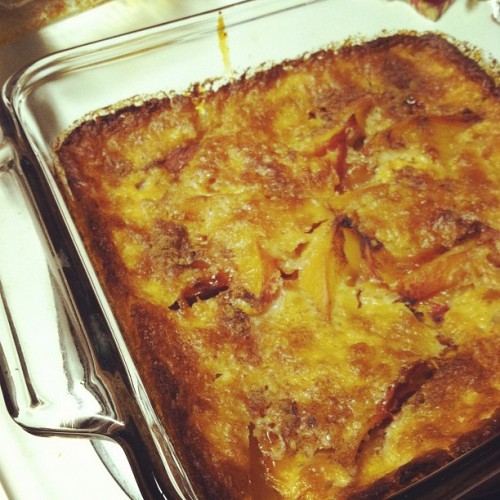
1. Eating delicious peach cobbler.  Recipe here. Definitely try it, incredibly yummy!
2. Cuddling with Blu Bird
3. Playing with Miles in the window and curtains
4. Making mini succulents!

Lots of fun packed into this Sunday.  Our plans for later are even more exciting, including making potato chips!  What kind of fun do you fit into your Sunday? 

- Lizzie

Thursday, July 26, 2012

You can just call me Suzy Homemaker

Lately my work schedule has been 8-2 or 7-1, so today is a rare day that I'm scheduled to work 1- close.  And let me tell you I am taking full advantage of this relaxing time.  The gentleman is at work so it's just me and the kitten babies.  So far we've baked a loaf of bread, done the laundry (most of it anyways), and washed all of the leftover dishes.  I've been in a very "bakey" mood the past couple of days and it really makes me feel like I should have been born in the 50's!


The gentleman and I have been making smoothies every morning... the green monster actually! (It's good!) The recipe requires bananas, so we obviously stocked up on bananas, not realizing we were going to run out of yogurt and not be able to make smoothies for a few days.  Thus we had a massive pile of brown bananas yesterday.  Now, the only logical thing you can do with brown bananas is bake banana bread! To me, this is one of the easiest things to bake, other than box cakes of course! My sister gave me a recipe a few years ago and I've been a banana bread baking fiend since.

Ingredients:
3-4 smushed/mashed bananas
No chocolate or strawberries this time, but still oh so delicious!
1 1/2 C all purpose flour
1 C sugar
1 beaten egg
1 tsp. vanilla extract
1 tsp baking soda
1/3 C melted butter
Pinch of salt

Directions:
1. Mix the butter into the bananas
2. Mix in sugar, egg, and vanilla
3. Sprinkle in baking soda and salt
4. Mix in flour
5. Put into a buttered pan and cook for one hour at 350

Sometimes I get a little bit crazy and add chocolate chips or strawberries, sometimes both!

I also always stock up on the easy muffin mixes, you know, the ones where all you have to add is milk or water.  We had a couple people over last night, so we also whipped up some mini blueberry muffins.

They're very yummy, and since they are so small, I don't feel quite so bad when I have two... or three!

My last baking adventure, was as I talked about earlier, my loaf of bread.  However now I'm not so sure you can really call it a loaf... perhaps more of a ball? I'll let you decide.

I got a fabulous recipe from Simply So Good for what she calls crusty bread.  It is also an incredibly easy bread to bake and only required four ingredients: flour, salt, water, and yeast! It's definitely my kind of recipe.  However if you are planning on making this bread, keep in mind that the dough has to rise for 12-18 hours!

We made the dough last night and set it aside until this morning when I got out our dutch oven and made a delicious loaf/ball of bread!


Very pleased with all of my baking adventures! I think my subconscious knew that starting next week I would have zero time for baking or anything exciting really.  Here's to hoping I can fit in a little bit more fun!


- Suzy Homemaker


Monday, January 16, 2012

Chicken Rollatini

Tonight we conquered a new recipe! While on pinterest, which may I add is definitely an obsession of mine, I found this recipe for chicken rollatini.  Ben and I just recently made a stuffed chicken that was absolutely delicious so I was immediately intrigued by this recipe.  After taking a look in the pantry we realized we were going to have to head back out to the store to get a few more ingredients.  We made a few changes to the recipe , ditching the prosciutto, switching the mozarella for muenster cheese, and lastly adding in a few bell peppers.  We were originally going to add in some spinach, but I kind of forgot and by the time Ben reminded me, half of the chicken was rolled up.  So instead we had a nice spinach side salad.


Overall this recipe was super easy, just a quick breading of the chicken using olive oil and lemon and the base.  Rolling them up with some yummy veggies and cheese, and finally baking them for about 25 minutes at 450. To accompany our rollatini, we made some couscous along with peas, bell pepper, and onion.  Chicken Rollatini was quite the yummy dinner, and I didn't even burn myself... I will definitely consider this a success and be adding this to my recipe book. 

Tomorrow we're back to school.  Hoping this semester will go by smoothly.