So, I can't lie, Ben and I had been talking about getting married for a while. So much so, that he had basically said by the end of next year, 2014, I'd be wifed up. So of course, thanks to Pinterest, I had been browsing some different save the date ideas and thinking about taking awesome engagement photos when the day came.
Well the day came, and I realized we're not broke, but we certainly don't have a ton of money to shell out for a wedding and especially engagement photos. Then I stumbled upon this bad boy. It was perfect. I made up a template pretty similar to the one on the site and we spent an afternoon in the Arizona heat, trying to capture the perfect photo to use. I am beyond excited about how they ended up!
I'm working on documenting my wedding better so sorry about the crummy picture to start. I promise the photos will get better!
We spent $17 ordering the photo sticker books and shipping and probably $5 for the card stock. Overall this was super easy and super cheap. I've also had a ton of positive feedback from relatives and friends! Even my great aunt, who is 93, understood and loved them.
So there's the first installment of my wedding DIY, hope you'll stick around for some of the later developments. We have invitations in the works along with lots of wonderful decorations!
- Liz
Showing posts with label diy. Show all posts
Monday, August 19, 2013
Monday, January 21, 2013
Monday = random furniture redo... right?
So here is a picture of my living room, well a tiny portion of it at least. I recently dyed my Ikea couch cover a bright yellow and have fallen in love. What I am not in love with though, is how boring the chest looks compared to the bright yellow. We found this chest in my basement and had plans to paint it at some point, but never got around to it. With no work today and no plans it was time to paint!
Sunday, January 20, 2013
Hanging out this weekend...
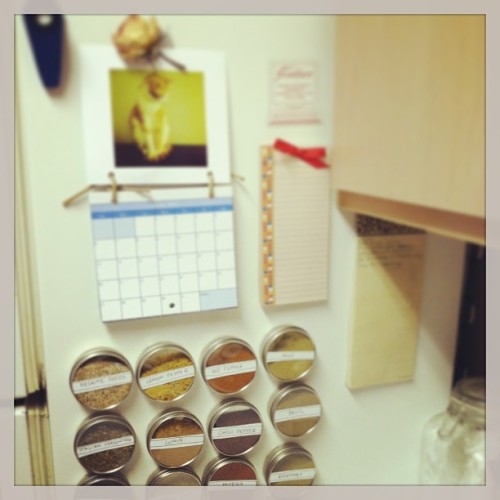
Recently I followed a DIY from A Beautiful Mess to make magnetic spice jars. Ours were previously on the wall, taking up a good bit of space. They are now happy little spice jars hanging out on the fridge - hanging out with another DIY project from A Beautiful Mess - an instagram calendar! With all of our new wall space we wanted to hang our pots up - giving us a bit more cabinet space, which we always need in our teeny tiny kitchen!
We started out with an old shelf from goodwill - let's just say it didn't turn out pretty.... We were frustrated and ready to just stick some nails in the wall and hang the dang pots up. Then I remembered we had some pallet wood left over from a previous project.
We worked out a design and got to work!
Tuesday, August 7, 2012
Mondays seem to be project days
So yesterday, after work, the gentleman and I on our drive home spotted a lot of furniture next to a dumpster of the apartment complex next to us. Well, growing up we did a lot of dumpster diving, for broom handles, furniture, anything of use. My mom always says that one man's junk can be another man's treasure. So of course, I made him pull over so I could determine whether or not anything was of value. We were in luck, there were some bar stools. We don't need any bar stools, but we had been planning to make a side table and a table for our plants, so the extra wood wouldn't hurt. We ripped off the disgusting seat cushions and threw three of the stools in the car. Once home, we got to work planning out what we were going to make.
After much talk (and I mean a lot of talking) we finally decided on a set up that would be perfect for our plants with storage for extra potting soil and pots.
![]() |
| The kittens were a great help throughout the project! |
Thursday, August 2, 2012
a rainy Thursday
Taking a look at my previous post, it's pretty easy to tell that it was a pretty lazy Thursday. I woke up this morning, not feeling too hot which put me in a bit of our sour mood. All I wanted to do was lay in bed and eat saltwater taffy (Who knew it was so delicious? We certainly had no idea!) While that's what I wanted to do, I decided it might be better to venture to Walmart and pick up some medicine. So off we went. Back at home with medicine I finally started feeling a bit better and realized that it was almost 1 and I hadn't done anything substantial all day. Thus began my yarn tree. Typing that, I realize I need to come up with a better name, because honestly that sounds so silly and stupid. I'll work on that more later though.
Monday, July 30, 2012
Monday, Monday...
Well I definitely didn't expect to be writing another blog today, but I just finished a project and had to write about it... Yeah it's that exciting. Before I get to that let me just say that I had the worst experience at Chick Fil-A today. I'm pretty sure we waited in line for approximately 25 minutes... ridiculous.
That's not to say I didn't thoroughly enjoy my free chicken sandwich (love coupons) or side salad. Now this is definitely not me supporting Chick Fil-A and their ideals... it is simply me supporting my own love for delicious chicken. However I can now say that I won't be visiting that establishment for quite some time, at least not until they hire a more competent staff.

Except we decided to just hang it under the coffee table. Which worked pretty well. The cats loved it and we knew they were safe on it, considering it was pretty much touching the ground. However I longed to have a true cat hammock, hanging from the ceiling. So today we hung it up. Let's just say it didn't work as well hanging from the ceiling as it did from under the table.
Now onto the super exciting stuff!
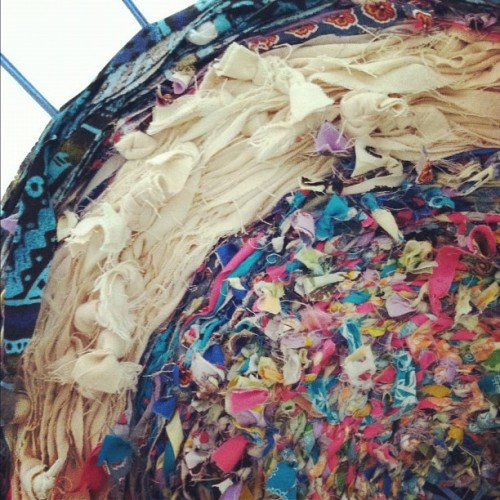
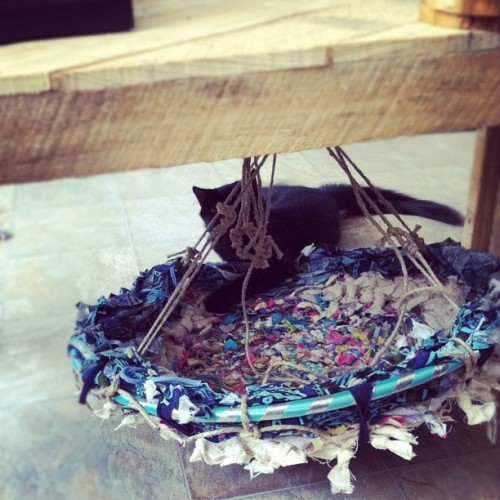
So a long, long time ago (maybe three months) I began to make one of those hoola hoop rugs. Well let me tell you those things are not nearly as easy as they might appear. Talk about time consuming. I ended up making it about half of the size I really wanted to make. So now what was I to do with this teeny tiny rug... well I had no idea so I just left it on the floor for a while. It was a pleasant surprise to see that the kitten babies loved it. They would sit on it at any time possible. I then came up with the brilliant idea of making it into a cat hammock! The gentleman and I attached some strings and had it looking somewhat like a hammock. However since the we were both moving soon, we decided to wait to hang it up. So we got to the new apartments and it was time to hang it up!

Except we decided to just hang it under the coffee table. Which worked pretty well. The cats loved it and we knew they were safe on it, considering it was pretty much touching the ground. However I longed to have a true cat hammock, hanging from the ceiling. So today we hung it up. Let's just say it didn't work as well hanging from the ceiling as it did from under the table.
Our once strong and sturdy hoola hoop was bending and breaking at every possible point. It was awful and I feared for Miles' life the entire time he was in there. I mean yes it worked and it might have stayed together, but I couldn't trust it with my babies' lives. So off to Walmart we went to find a sturdier hoola hoop. We were a little surprised with ourselves when we left the store with not another hoola hoop but a picture frame... minus the glass. I got right to work tearing apart the old contraption and adding some support to the new picture frame.
| Using strips from and old t-shirt made great and bouncy support for the hammock. |
Once the support was attached, I wrapped the hammock section/rug around the frame.
After wrapping the hammock section around the frame we secured it with a few pieces of hemp. Once secure, we added the hanging strips and hung it up. It is awesome and Miles definitely loves it. So much so that Blu has not even had a chance to see it yet.
Everyone here is very pleased with the new and improved cat hammock. However I am beginning to wonder, are we those crazy cat people?
- Elizabeth
Wednesday, July 18, 2012
resurrection
To resurrect this long lost blog I felt I should start off with a little craft I completed today.
Since the new school year and student teaching (eek!) are just around the corner I decided I needed a new camera. This way I'll be able to beef up my portfolio with pictures. On top of that, this is my last semester, I want to capture every moment possible. (I also want to take pictures of the kitten babies!)
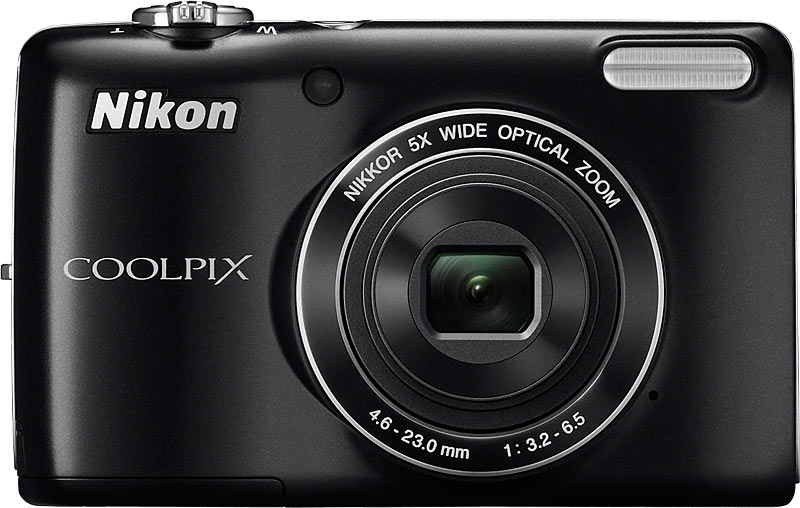
So last week I got on the good ol' interwebs and found myself a nice camera for a pretty good price. It's a Nikon L26 and for what I payed and what I'll be using it for it's perfect!
I was very excited when it arrived yesterday and started taking pictures right away. Now, I don't have the best history with electronics and not breaking them, so I decided right away that I needed to make a case for my brand new baby.
First things first, I gathered all of my materials:
- needle
- thread
- various bits of fabric
- buttons
- hemp
I recently picked up some beautiful fabric from a local thrift store for super cheap, but I hadn't decided what I wanted to actually use it for. I decided that this fabric was destined for the camera case! Using my new fabric and some old canvas I made two pouches that my camera would fit. I then sewed the canvas pouch inside of the printed fabric. I sewed the two pouches together and then added a little drawstring. I'm very proud of myself, considering it is all hand sewn. It's not the most protective case ever, but It will keep my new baby safe in my purse, which is where it will spend most of it's life.
Since the new school year and student teaching (eek!) are just around the corner I decided I needed a new camera. This way I'll be able to beef up my portfolio with pictures. On top of that, this is my last semester, I want to capture every moment possible. (I also want to take pictures of the kitten babies!)
So last week I got on the good ol' interwebs and found myself a nice camera for a pretty good price. It's a Nikon L26 and for what I payed and what I'll be using it for it's perfect!
I was very excited when it arrived yesterday and started taking pictures right away. Now, I don't have the best history with electronics and not breaking them, so I decided right away that I needed to make a case for my brand new baby.
First things first, I gathered all of my materials:
- needle
- thread
- various bits of fabric
- buttons
- hemp
I recently picked up some beautiful fabric from a local thrift store for super cheap, but I hadn't decided what I wanted to actually use it for. I decided that this fabric was destined for the camera case! Using my new fabric and some old canvas I made two pouches that my camera would fit. I then sewed the canvas pouch inside of the printed fabric. I sewed the two pouches together and then added a little drawstring. I'm very proud of myself, considering it is all hand sewn. It's not the most protective case ever, but It will keep my new baby safe in my purse, which is where it will spend most of it's life.
| Isn't this print precious? |
Again I'm pretty proud of myself, but the actual case hasn't really been put to use yet, so we'll see how it holds up over time! Definitely looking forward to taking advantage of the new camera in the very near future, so be prepared to have a photo overload!
I'll leave you with a photo from my kitten photo shoot yesterday!
| Miles and his rather large rear end. |
Subscribe to:
Posts (Atom)